
초보 코린이의 성장 일지
UE4 Equip, DoAction 본문
무기 장착 모션만 나올뿐 아직은 무기를 들지 못한다 노티파이를 적용시키지도 않았으며, 특정한 명령을 제대로 내려주지 못한 상태이다. 그래서 이 두가지 기능을 만들어 무기를 뽑아볼 것이다.
#include "CoreMinimal.h"
#include "UObject/NoExportTypes.h"
#include "Weapons/CWeaponStructures.h"
#include "CEquipment.generated.h"

// 델리게이트 이벤트
DECLARE_DYNAMIC_MULTICAST_DELEGATE(FEquipmentBeginEquip);
DECLARE_DYNAMIC_MULTICAST_DELEGATE(FEquipmentUnequip);

UCLASS()
class U2212_06_API UCEquipment : public UObject
{
	GENERATED_BODY()

public:
	UFUNCTION(BlueprintNativeEvent)
		void Begin_Equip();
	void Begin_Equip_Implementation();

    UFUNCTION(BlueprintNativeEvent)
		void Unequip();
	void Unequip_Implementation();

public:
	// 델리게이트 이벤트를 처리할 변수.
	FEquipmentBeginEquip OnEquipmentBeginEquip;
	FEquipmentUnequip OnEquipmentUnequip;

};
#include "Weapons/CEquipment.h"
#include "Global.h"
#include "GameFramework/Character.h"
#include "Components/CMovementComponent.h"
#include "Components/CStateComponent.h"
#include "CEquipment.h"
void UCEquipment::Begin_Equip_Implementation()
{
bBeginEquip = true;
// 연결이 되어있다면,
if (OnEquipmentBeginEquip.IsBound())
OnEquipmentBeginEquip.Broadcast();
}
void UCEquipment::Unequip_Implementation()
{
bEquipped = false;
Movement->DisableControlRotation();
// 연결이 되어있다면,
if (OnEquipmentUnequip.IsBound())
OnEquipmentUnequip.Broadcast();
}1. 델리게이트 이벤트를 연결해준다.
2. 연결 유무 확인해주고 실행.
#pragma once

#include "CoreMinimal.h"
#include "GameFramework/Actor.h"
#include "CAttachment.generated.h"

UCLASS()
class U2212_06_API ACAttachment : public AActor
{
	GENERATED_BODY()

protected:
	virtual void BeginPlay() override;

public:
	// 델리게이션 연결, BP에서 수정할 수 있도록.
	UFUNCTION(BlueprintImplementableEvent)
		void OnBeginEquip();

	UFUNCTION(BlueprintImplementableEvent)
		void OnUnequip();

};
#include "Weapons/CWeaponAsset.h"
#include "Global.h"
#include "CAttachment.h"
#include "CEquipment.h"
#include "CDoAction.h"
#include "GameFramework/Character.h"
void UCWeaponAsset::BeginPlay(ACharacter* InOwner)
{
if (!!EquipmentClass)
{
// Object 동적할당, 실제로 만들어질 EquipmentClass
Equipment = NewObject<UCEquipment>(this, EquipmentClass);
Equipment->BeginPlay(InOwner, EquipmentData); // 정의해 놓은거 대입
if (!!Attachment)
{
// 델리게이션을 불러, 무기 연결
Equipment->OnEquipmentBeginEquip.AddDynamic(Attachment, &ACAttachment::OnBeginEquip);
Equipment->OnEquipmentUnequip.AddDynamic(Attachment, &ACAttachment::OnUnequip);
}
}
}1. Attachment에 델리게이션 연결을 위해 가져와준다.
2. Attach 유무를 확인하고 가능하다면 무기를 연결 시켜준다.
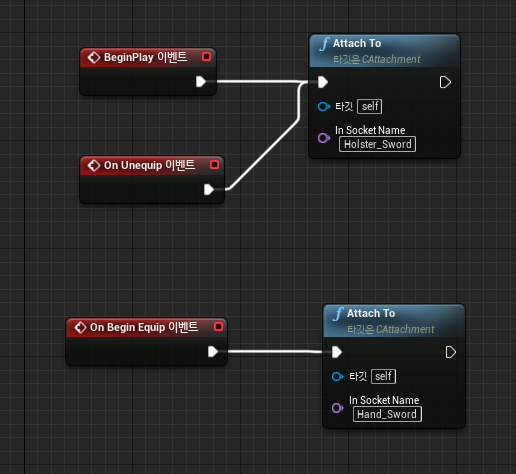
1. BP로가서 소켓에 붙여준다.
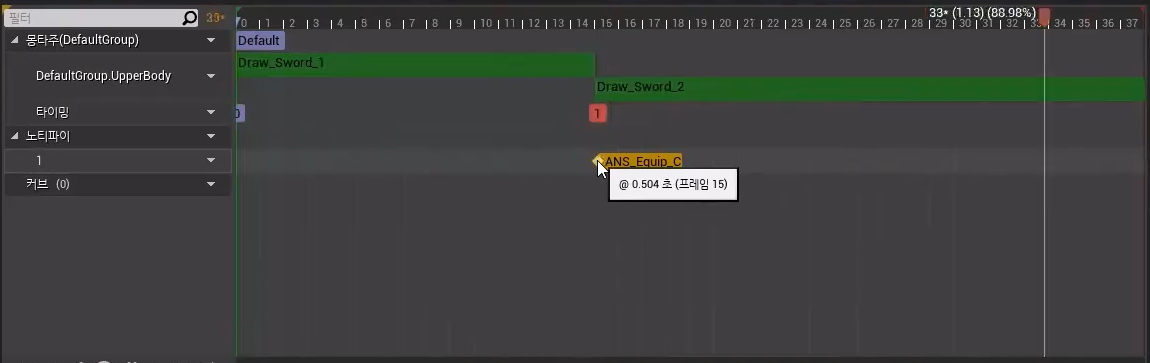
2. 이제 노티파이 작업을 해줄 것이다.
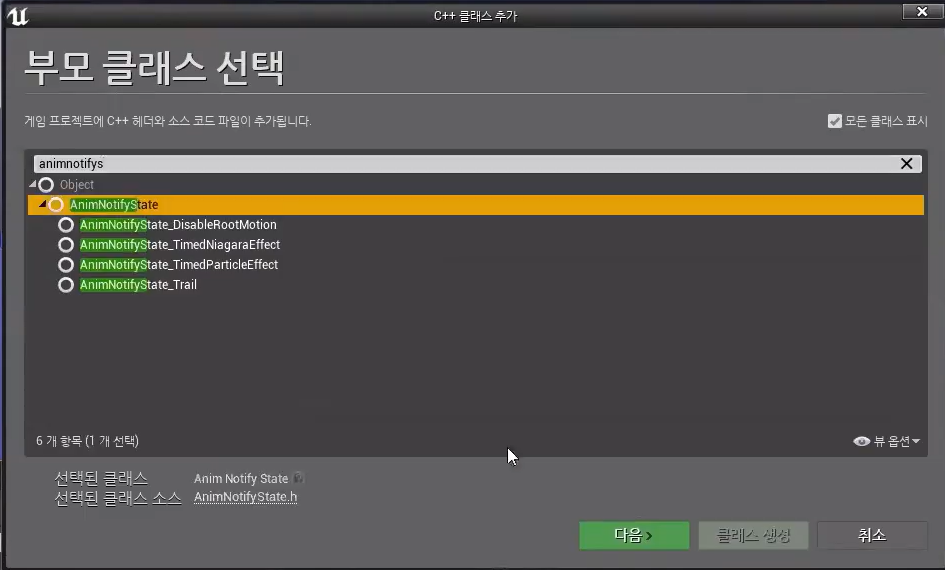
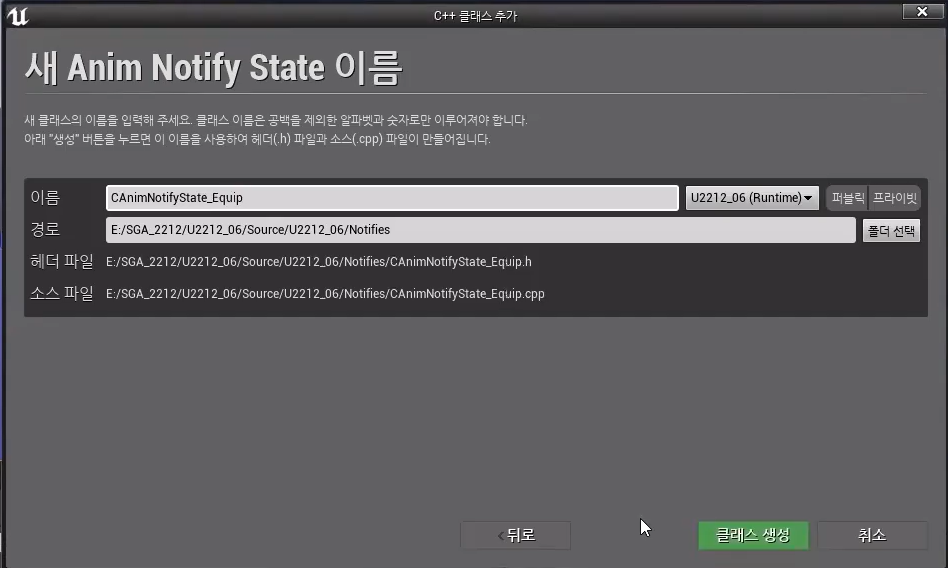
1. 노티파이는 State로 범위를 길게 사용할 것이다.
#pragma once

#include "CoreMinimal.h"
#include "Animation/AnimNotifies/AnimNotifyState.h"
#include "CAnimNotifyState_Equip.generated.h"

UCLASS()
class U2212_06_API UCAnimNotifyState_Equip : public UAnimNotifyState
{
	GENERATED_BODY()

public:
	FString GetNotifyName_Implementation() const override;

	// BP 노티파이 생성시 Begin, End 있는것과 동일한 내용
	virtual void NotifyBegin(USkeletalMeshComponent* MeshComp, UAnimSequenceBase* Animation, float TotalDuration) override;
	virtual void NotifyEnd(USkeletalMeshComponent* MeshComp, UAnimSequenceBase* Animation) override;

};
#include "Notifies/CAnimNotifyState_Equip.h"
#include "Global.h"
#include "Components/CWeaponComponent.h"
#include "Weapons/CEquipment.h"
FString UCAnimNotifyState_Equip::GetNotifyName_Implementation() const
{
return "Equip";
}
void UCAnimNotifyState_Equip::NotifyBegin(USkeletalMeshComponent* MeshComp, UAnimSequenceBase* Animation, float TotalDuration)
{
// 있는지 체크 후 무기를 뽑는 모션이 나오면 뽑도록.
Super::NotifyBegin(MeshComp, Animation, TotalDuration);
CheckNull(MeshComp);
CheckNull(MeshComp->GetOwner());
UCWeaponComponent* weapon = CHelpers::GetComponent<UCWeaponComponent>(MeshComp->GetOwner());
CheckNull(weapon);
CheckNull(weapon->GetEquipment());
weapon->GetEquipment()->Begin_Equip();
}
void UCAnimNotifyState_Equip::NotifyEnd(USkeletalMeshComponent* MeshComp, UAnimSequenceBase* Animation)
{
// 있는지 체크 후 무기를 넣는 모션이 나오면 넣도록.
Super::NotifyEnd(MeshComp, Animation);
CheckNull(MeshComp);
CheckNull(MeshComp->GetOwner());
UCWeaponComponent* weapon = CHelpers::GetComponent<UCWeaponComponent>(MeshComp->GetOwner());
CheckNull(weapon);
CheckNull(weapon->GetEquipment());
weapon->GetEquipment()->End_Equip();
}1. 노티파이 구간에 대한 동작이 나오도록 만들어준다.
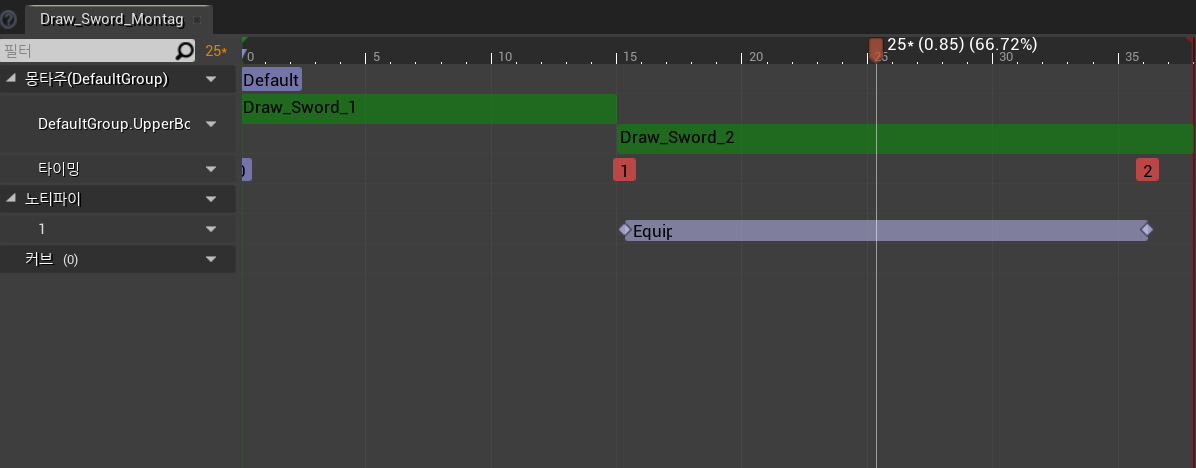
1. 노티파이를 State로 만들어 준걸로 교체해준다.
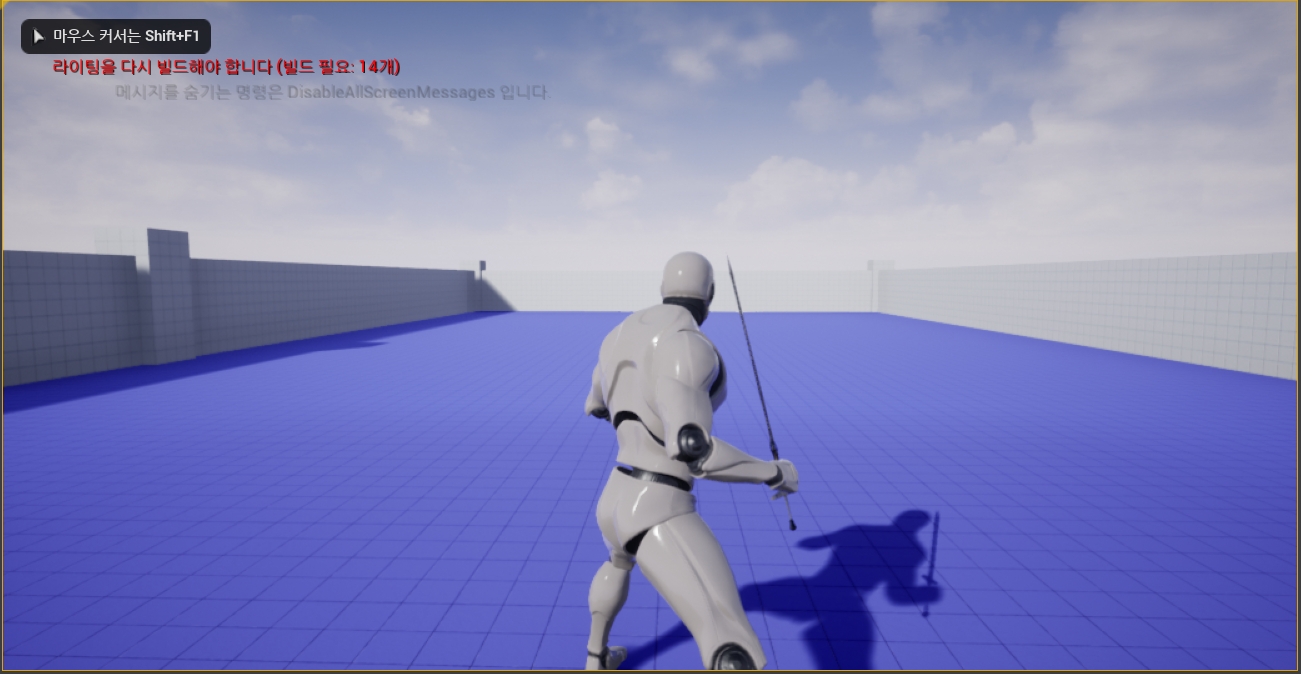
1. 이재 동작만 나오는게 아닌 무기까지 뽑게된다.
이제 무기가 바뀌면 통보를 해주기 위해 AnimInstance에서 작업을 할 것이다.
#pragma once

#include "CoreMinimal.h"
#include "Animation/AnimInstance.h"
#include "Components/CWeaponComponent.h"
#include "CAnimInstance.generated.h"

UCLASS()
class U2212_06_API UCAnimInstance : public UAnimInstance
{
	GENERATED_BODY()

protected:
	UPROPERTY(BlueprintReadOnly, EditAnywhere, Category = "Animation")
		EWeaponType WeaponType = EWeaponType::Max;

private:
	class UCWeaponComponent* Weapon;

};
#include "Characters/CAnimInstance.h"
#include "Global.h"
#include "GameFramework/Character.h"
void UCAnimInstance::NativeBeginPlay()
{
Super::NativeBeginPlay();
OwnerCharacter = Cast<ACharacter>(TryGetPawnOwner());
CheckNull(OwnerCharacter);
// Weapon 연결해준다.
Weapon = CHelpers::GetComponent<UCWeaponComponent>(OwnerCharacter);
if (!!Weapon)
Weapon->OnWeaponTypeChange.AddDynamic(this, &UCAnimInstance::OnWeaponTypeChanged);
}
void UCAnimInstance::OnWeaponTypeChanged(EWeaponType InPrevType, EWeaponType InNewType)
{
// 타입만 새로운 타입으로,
WeaponType = InNewType;
}1. Weapon Type에 대한 변수와 연결해줄 함수를 생성해준다.
2. Weapon 연결해주고, 새로운 타입에 대해 변경이 되도록 만들어준다.
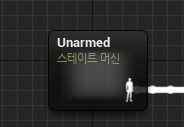
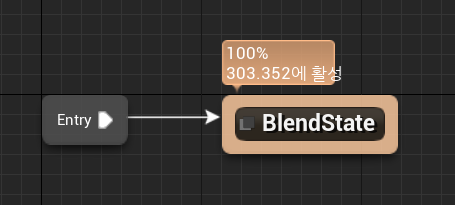
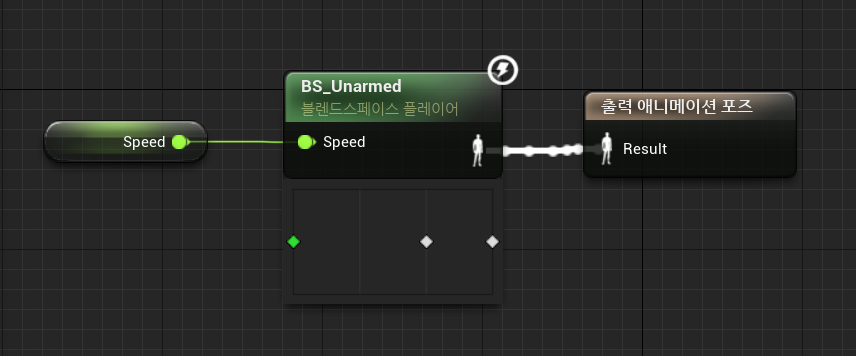
1. Unarmed를 New State Machine를 만들어서 안에 넣어준다.
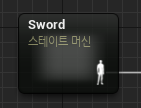
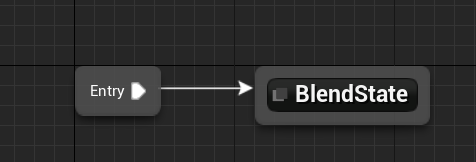
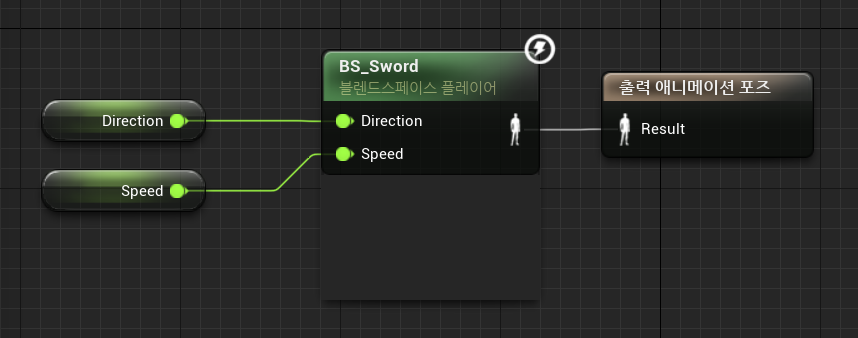
1. Sword도 동일하게 만들어주고, 값을 넣어준다.
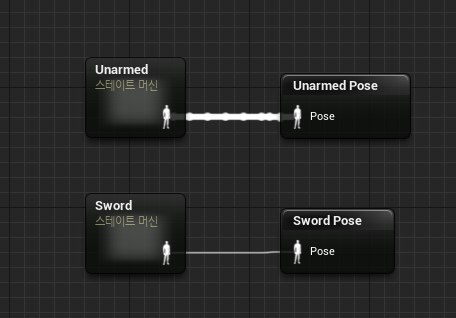
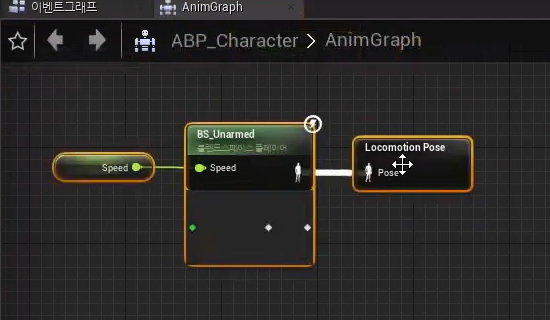
1. 포즈를 만들어서 연결해준다.
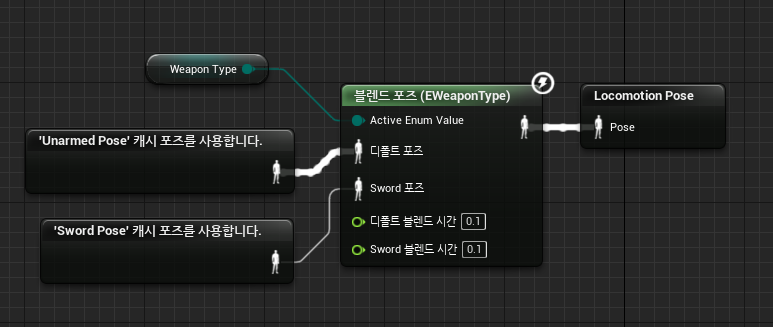
1. 블랜드 포즈에 Unarmed, Sword 포즈를 넣어주고 연결.
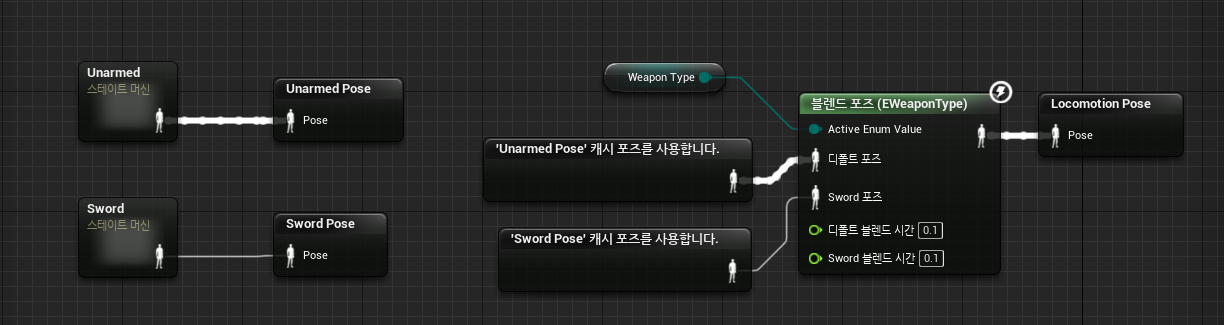
1. 위 사진처럼 애니메이션 작업이 완료된다.
2. 이제는 무기를 장착하고 해제할시 Unarmed 모션이 자연스럽게 나오는걸 알 수 있다.
이제 공격 콤보를 구현해 볼 것이다. 이건 따로 설정할게 없고 기능만을 제공할 것이므로, BP에서 정의하지 못하게 만들것이다.
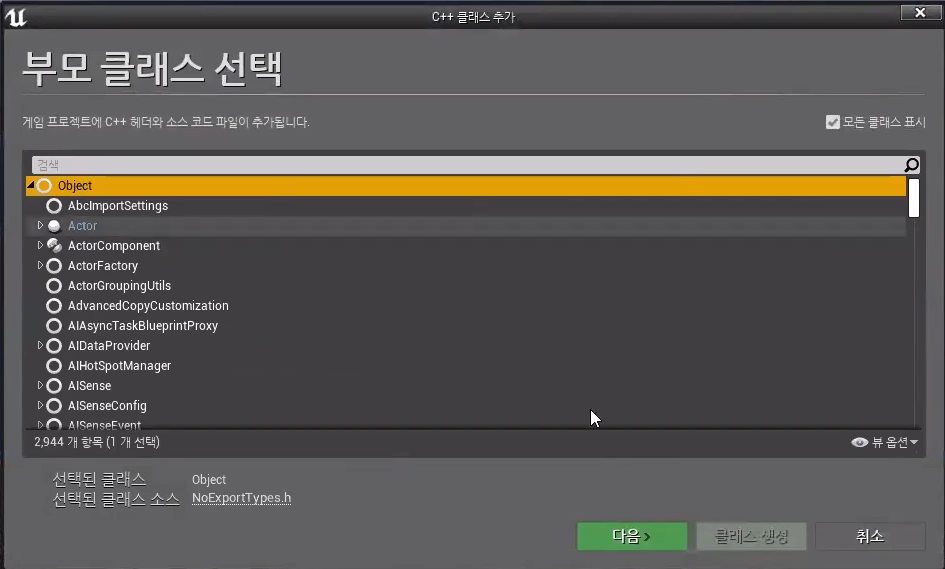
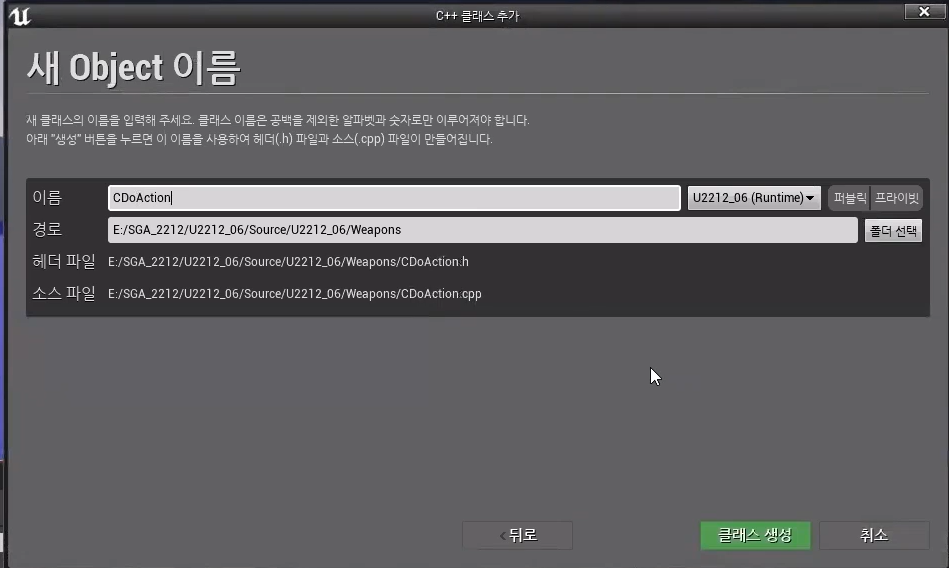
1. 액션을 실행할 클래스 생성.
#pragma once

#include "CoreMinimal.h"
#include "UObject/NoExportTypes.h"
#include "CWeaponStructures.generated.h"

USTRUCT()
struct FDoActionData // 액션 구조체
{
	GENERATED_BODY()

public:
	// 에디터에서 세팅은 해야하므로, EditAnywhere.
	UPROPERTY(EditAnywhere)
		class UAnimMontage* Montage;

	UPROPERTY(EditAnywhere)
		float PlayRate = 1;

	UPROPERTY(EditAnywhere)
		bool bCanMove = true;

	UPROPERTY(EditAnywhere)
		bool bFixedCamera = true;

	UPROPERTY(EditAnywhere)
	// UFXSystemAsset 파티클, 나이아가라 공통 부모
		class UFXSystemAsset* Effect; // 파티클, 나이아가라 사용하기 위해.

	UPROPERTY(EditAnywhere)
	// 방향 보정치
		FVector EffectLocation = FVector::ZeroVector;

	UPROPERTY(EditAnywhere)
	// 이팩트 크기 보정.
		FVector EffectScale = FVector::OneVector;

public:
	// 액션을 이곳에 넣기 위한 함수
	void DoAction(class ACharacter* InOwner);

};

UCLASS()
class U2212_06_API UCWeaponStructures : public UObject
{
	GENERATED_BODY()

};
#include "Weapons/CWeaponStructures.h"
#include "Global.h"
#include "GameFramework/Character.h"
#include "Components/CStateComponent.h"
#include "Components/CMovementComponent.h"
#include "Animation/AnimMontage.h"
void FDoActionData::DoAction(ACharacter* InOwner)
{
// Owner로 부터 Movement를 가져온다.
UCMovementComponent* movement = CHelpers::GetComponent<UCMovementComponent>(InOwner);
if (!!movement)
{
// 카페라 고정이면,
if (bFixedCamera)
movement->EnableFixedCamera();
// 이동이 금지라면,
if (bCanMove == false)
movement->Stop();
}
// 구조체안에 몽타주가 null이 아니라면 실행
if (!!Montage)
InOwner->PlayAnimMontage(Montage, PlayRate);
}1. 우선 DoAction을 하기 위한 Data들을 한 곳에 모아둘 것이다.
2. 몽타주 실행에 필요한 조건들을 체크 후 실행.
#pragma once

#include "CoreMinimal.h"
#include "UObject/NoExportTypes.h"
#include "Weapons/CWeaponStructures.h"
#include "CDoAction.generated.h"

UCLASS(Abstract) // 객체화 되면 안되므로 Abstract
class U2212_06_API UCDoAction : public UObject
{
	GENERATED_BODY()

public:
	UCDoAction(); // 생성자

	// 재정의 할 수 있도록, BeginPlay를 임의로 만들어놓는다
	virtual void BeginPlay
	(
		class ACAttachment* InAttachment,
		class UCEquipment* InEquipment,
		class ACharacter* InOwner,
		const TArray<FDoActionData>& InDoActionDatas
	);

public:
	// 외부에서 명령 내릴 동작. 자식에서 필요하면 재정의 가능하도록 가상.
	virtual void DoAction();
	virtual void Begin_DoAction();
	virtual void End_DoAction();


protected:
	bool bBeginAction; // 액션에 들어갔는지,

	class ACharacter* OwnerCharacter;
	class UWorld* World; // Owner에 World

	class UCMovementComponent* Movement;
	class UCStateComponent* State;

	TArray<FDoActionData> DoActionDatas; // 액션이 여러개 나올수 있으므로 배열,


};
#include "Weapons/CDoAction.h"
#include "Global.h"
#include "CAttachment.h"
#include "CEquipment.h"
#include "GameFramework/Character.h"
#include "Components/CStateComponent.h"
#include "Components/CMovementComponent.h"
UCDoAction::UCDoAction()
{
}
void UCDoAction::BeginPlay(ACAttachment* InAttachment, UCEquipment* InEquipment, ACharacter* InOwner, const TArray<FDoActionData>& InDoActionDatas)
{
// 값들을 받아 넣어준다.
OwnerCharacter = InOwner;
World = OwnerCharacter->GetWorld();
State = CHelpers::GetComponent<UCStateComponent>(OwnerCharacter);
Movement = CHelpers::GetComponent<UCMovementComponent>(OwnerCharacter);
DoActionDatas = InDoActionDatas;
}
void UCDoAction::DoAction()
{
// 구조체에있는 DoAction을 직접적으로 콜할게 아니다.
// 각 각 맞는 상황에서 맞는 동작을 콜하게 될 것이므로, SetActionMode로 처리.
State->SetActionMode();
}
void UCDoAction::Begin_DoAction()
{
bBeginAction = true;
}
void UCDoAction::End_DoAction()
{
bBeginAction = false;
State->SetIdleMode(); // Idle로 동작 돌려주기
Movement->Move(); // 정상적으로 움직이게
Movement->DisableFixedCamera(); // 카메라도 돌려준다.
}1. 이제 만들어 놓은 DoAction에 다른 모션도 사용할 수 있도록 재정의하게끔 설정.
2. 각 모션에 알맞은 처리를 해준다.

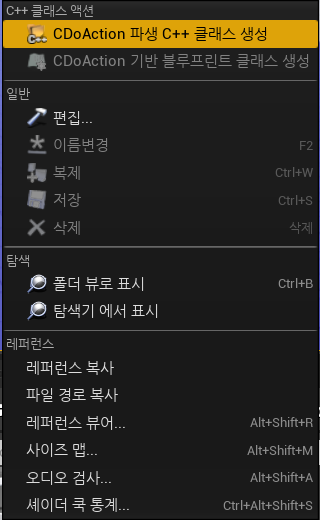
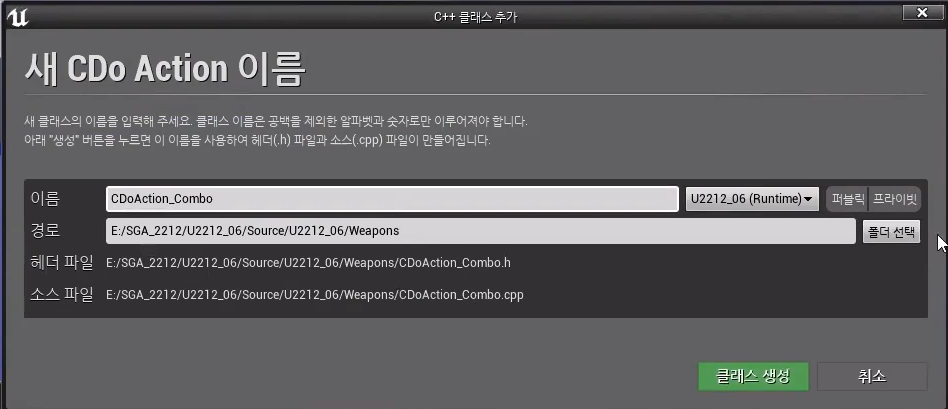
1. 연속적인 동작이 나올 수 있도록 클래스 추가.
#pragma once

#include "CoreMinimal.h"
#include "Weapons/CDoAction.h"
#include "CDoAction_Combo.generated.h"

UCLASS()
class U2212_06_API UCDoAction_Combo : public UCDoAction
{
	GENERATED_BODY()

public:
	// 외부에서 접근 허용해주기 위한 return 함수.
	FORCEINLINE void EnableCombo() { bEnable = true; }
	FORCEINLINE void DisableCombo() { bEnable = false; }

public:
	// DoAction에서 있는 virtral 가져와서 override.
	void DoAction() override;
	void Begin_DoAction() override;
	void End_DoAction() override;

private:
	int32 Index; // 콤보 번호

	bool bEnable; // 콤보 구간인지.
	bool bExist; // 콤보 구간에서 입력을 받았는지.
};
#include "Weapons/DoActions/CDoAction_Combo.h"
#include "Global.h"
#include "GameFramework/Character.h"
#include "Components/CStateComponent.h"
void UCDoAction_Combo::DoAction()
{
// 데이터가 한개라도 없으면 안되므로 체크,
CheckTrue(DoActionDatas.Num() < 1);
if (bEnable)
{
bEnable = false;
bExist = true;
return; // 콤보 구간이 아니라면 return
}
CheckFalse(State->IsIdleMode()); // 첫 타격이 실행된다는건 Idle모드가 먼저 실행 체크
// 첫타격이 들어가기도 전에 액션모드가 실행되면 안되므로, Super는 액션 후에들어와야 한다.
Super::DoAction();
// 액션모드 세팅이 되면 데이터안에 행동 시작.
DoActionDatas[Index].DoAction(OwnerCharacter);
}
void UCDoAction_Combo::Begin_DoAction()
{
Super::Begin_DoAction(); // DoAction 중인지 체크
CheckFalse(bExist); // 다음 콤보 체크
bExist = false; // 아니라면
DoActionDatas[++Index].DoAction(OwnerCharacter); // 인덱스 증가, 다음 동작 나오도록
}
void UCDoAction_Combo::End_DoAction()
{
Super::End_DoAction();
Index = 0; // 끝이 났으므로 인덱스 초기화.
}1. 각 액션에 관해 override 해서 받아온다.
2. 콤보가 가능한지 체크해준다.
3. 부모 실행이 먼저인지 체크를 잘해줘야한다. 먼저 세팅 후에 들어가야 하므로 조심.
4. 액션 인덱스가 증가할 수 있는가 체크 후 맞다면 증가해주면서 다음 액션이 나오게 만들어준다.
#pragma once

#include "CoreMinimal.h"
#include "Engine/DataAsset.h"
#include "Weapons/CWeaponStructures.h"
#include "CWeaponAsset.generated.h"

UCLASS()
class U2212_06_API UCWeaponAsset : public UDataAsset
{
	GENERATED_BODY()

private:
	// 직렬화
	UPROPERTY(EditAnywhere)
	// 객체를 스판시킨다.
		TSubclassOf<class ACAttachment> AttachmentClass;

	UPROPERTY(EditAnywhere)
		FEquipmentData EquipmentData; // 구조체 가져오기

	UPROPERTY(EditAnywhere)
		TSubclassOf<class UCEquipment> EquipmentClass;

    // 추가된 부분
	UPROPERTY(EditAnywhere) // DoAction 클래스 생성
		TSubclassOf<class UCDoAction> DoActionClass;

    // 추가된 부분
	UPROPERTY(EditAnywhere) // 데이터 가져오기
		TArray<FDoActionData> DoActionDatas;

public:
	// 생성된걸 return 해주기 위해
	FORCEINLINE class ACAttachment* GetAttachment() { return Attachment; }
	FORCEINLINE class UCEquipment* GetEquipment() { return Equipment; }
	FORCEINLINE class UCDoAction* GetDoAction() { return DoAction; } // 추가된 부분

public:
	UCWeaponAsset();

	// 외부에서 BeginPlay일때 콜해주기 위해 이름을 알기 쉽도록 만들어줬다.
	void BeginPlay(class ACharacter* InOwner);

private:
	// UObject로부터 상속을 받았기 때문에 생명주기로 관리를 받지 않는다.
	// 그래서 가비지 컬렉터가 조금이라도 사용을 하지 않는다고 판단하면, 임의로 제거시켜버린다.
	// 직렬화를 넣어주게 되면, 직렬화된 상태로 판단하고 가비지 컬렉터가 사용자가 제거하기 전까지 물고 있어주기 때문에 제거되지 않는다.
	UPROPERTY()
		class ACAttachment* Attachment;

	UPROPERTY()
		class UCEquipment* Equipment; // 추가된 부분

	UPROPERTY()
		class UCDoAction* DoAction; // 추가된 부분
};
#include "Weapons/CWeaponAsset.h"
#include "Global.h"
#include "CAttachment.h"
#include "CEquipment.h"
#include "CDoAction.h"
#include "GameFramework/Character.h"
UCWeaponAsset::UCWeaponAsset()
{
// 기본값으로 StaticClass를 넣어준다.
AttachmentClass = ACAttachment::StaticClass();
EquipmentClass = UCEquipment::StaticClass();
DoActionClass = UCDoAction::StaticClass();
}
void UCWeaponAsset::BeginPlay(ACharacter* InOwner)
{
if (!!AttachmentClass)
{
FActorSpawnParameters params;
params.Owner = InOwner;
// 선택이 되어있다면 붙여주기.
Attachment = InOwner->GetWorld()->SpawnActor<ACAttachment>(AttachmentClass, params);
}
if (!!EquipmentClass)
{
// Object 동적할당, 실제로 만들어질 EquipmentClass
Equipment = NewObject<UCEquipment>(this, EquipmentClass);
Equipment->BeginPlay(InOwner, EquipmentData); // 정의해 놓은거 대입
if (!!Attachment)
{
// 델리게이션을 불러, 무기 연결
Equipment->OnEquipmentBeginEquip.AddDynamic(Attachment, &ACAttachment::OnBeginEquip);
Equipment->OnEquipmentUnequip.AddDynamic(Attachment, &ACAttachment::OnUnequip);
}
}
// 추가된 부분
if (!!EquipmentClass)
{
// DoAction 생성
DoAction = NewObject<UCDoAction>(this, DoActionClass);
DoAction->BeginPlay(Attachment, Equipment, InOwner, DoActionDatas); // 시작시 값 세팅들
}
}1. 에셋안에 있어야 할것을 다시 선언해준다.
2. DoAction 생성과, 값들을 넣어주고 시작.
#pragma once

#include "CoreMinimal.h"
#include "Components/ActorComponent.h"
#include "CWeaponComponent.generated.h"

public:
	class UCDoAction* GetDoAction();

public:
	void DoAction();

};
#include "Components/CWeaponComponent.h"
#include "Global.h"
#include "CStateComponent.h"
#include "GameFramework/Character.h"
#include "Weapons/CWeaponAsset.h"
#include "Weapons/CAttachment.h"
#include "Weapons/CEquipment.h"
#include "Weapons/CDoAction.h"
UCWeaponComponent::UCWeaponComponent()
{
}
UCDoAction* UCWeaponComponent::GetDoAction()
{
CheckTrueResult(IsUnarmedMode(), nullptr);
CheckFalseResult(!!DataAssets[(int32)Type], nullptr);
return DataAssets[(int32)Type]->GetDoAction();
}
void UCWeaponComponent::DoAction()
{
// DoAction 있는지 체크 후 콜만해주면 된다.
if (!!GetDoAction())
GetDoAction()->DoAction();
}1. WeaponComponent에서 이제 명령을 Player에게 내려준다.
2. 있는지 확인 후 있다면 Player에게 넘겨준다.
#include "Characters/CPlayer.h"
#include "Global.h"
#include "CAnimInstance.h"
#include "GameFramework/SpringArmComponent.h"
#include "GameFramework/CharacterMovementComponent.h"
#include "Camera/CameraComponent.h"
#include "Components/SkeletalMeshComponent.h"
#include "Components/InputComponent.h"
#include "Components/CWeaponComponent.h"
#include "Components/CMontagesComponent.h"
#include "Components/CMovementComponent.h"

void ACPlayer::SetupPlayerInputComponent(UInputComponent* PlayerInputComponent)
{
	Super::SetupPlayerInputComponent(PlayerInputComponent);

	PlayerInputComponent->BindAction("Action", EInputEvent::IE_Pressed, Weapon, &UCWeaponComponent::DoAction);
}
1. Player로 와서 DoAction 콜해주면 끝이난다.
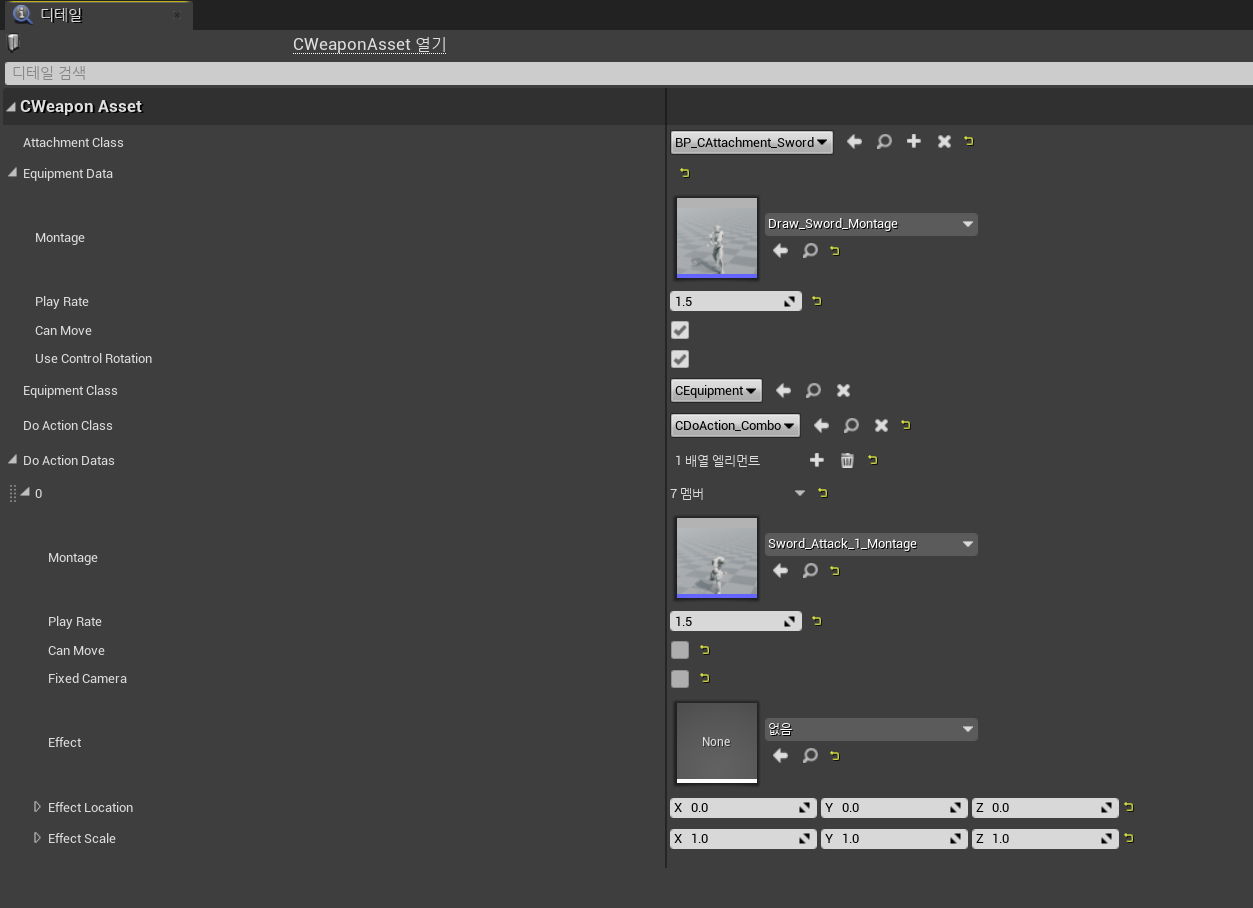
1. BP로가서 값을 설정해준다.
2. 우선 공격 모션이 한번은 플레이가 될 것이다. 나머지는 다시 설정해 줄 것이다.
https://www.youtube.com/watch?v=3teRdYcSpXM
'언리얼' 카테고리의 다른 글
| UE4 HitData, Effect, Sound, HitStop (0) | 2023.05.09 |
|---|---|
| UE4 AnimNotify, ComboState, TakeDamage (0) | 2023.05.08 |
| UE4 Weapon Attach, Sword Equip (0) | 2023.05.01 |
| UE4 Notify, Attach, Weapon (0) | 2023.04.28 |
| UE4 Component, BackStep (0) | 2023.04.27 |


