
초보 코린이의 성장 일지
UE4 StaticMesh 본문
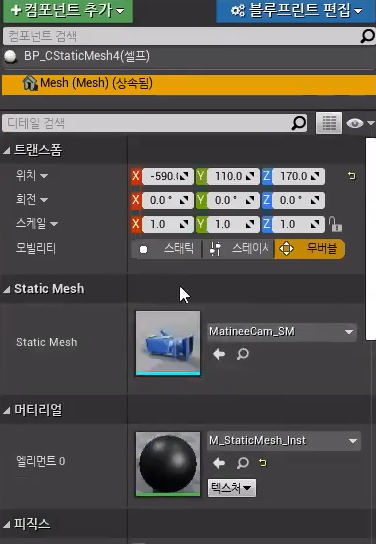
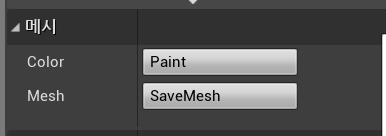
1. 에디터안에 카테고리에 무언가를 추가하기 위해서는 StaticComponent를 가져와야 한다.
2. 그 안에 그릴 정보는 StaticMesh를 가져와서 작업을 진행해야한다.
더보기
#include "StaticMesh_Detail.h"
#include "DetailLayoutBuilder.h"
#include "DetailCategoryBuilder.h"
#include "DetailWidgetRow.h"
#include "Misc/MessageDialog.h"
#include "Serialization/BufferArchive.h"

#include "CStaticMesh.h"

// 에디터 상에서만 끼워넣기 때문에, 게임모드인지 확인할 수 있는 방법이 없다.
FReply FStaticMesh_Detail::OnClicked_SaveMesh()
{
	// 게임모드인지를 모르지만 실행하려면, 어떠한 한 객체가 선택이 되어있어야만 한다.
	// 그래서 Objects 0번을 확인하면, 그 객체가 게임상 월드인지 에디터상 월드인지 판단이 가능하다.
	if (Objects[0]->GetWorld()->IsPlayInEditor())
	{
		FMessageDialog dialog;
		dialog.Debugf(FText::FromString("In game mode, it is not working."));

		// 처리를 못했으므로, Un으로 return 해주기, 밑으로 내려줘야 하기 때문
		return FReply::Unhandled();

	}

	TArray<ACStaticMesh*> meshActors;
	for (TWeakObjectPtr<UObject> obj : Objects)
	{
		ACStaticMesh* mesh = Cast<ACStaticMesh>(obj);
		if (mesh == nullptr) continue; // cast후 null이면 저장할 자료형이 아니므로 끝

		meshActors.Add(mesh); // 저장
	}

	for (int32 i = 0; i < meshActors.Num(); i++)
	{
		// Static 컴포넌트 가져오기.
		UActorComponent* actorComponent =  meshActors[i]->GetComponentByClass(UStaticMeshComponent::StaticClass());
		// ActorComponent를 StaticMeshComponent로 캐스팅해준다.
		UStaticMeshComponent* meshComponent = Cast<UStaticMeshComponent>(actorComponent);
		// 없으면 진행 x, 자기자신꺼 처리를 할게 없으므로 아래에서 처리하라는 의미로 FReply::Unhandled 해준다 (터널링)
		if (meshComponent == nullptr) return FReply::Unhandled();

		// 실제 그릴 정보
		UStaticMesh* mesh = meshComponent->GetStaticMesh();
		// mesh도 없다면 그릴정보가 없으므로 아래로 넘겨준다,.
		if (mesh == nullptr) return FReply::Unhandled();

		// 정점 정보
		FStaticMeshRenderData* renderData =  mesh->RenderData.Get();
		// LODResources는 여러 계층으로 되어있으므로 배열.
		if (renderData->LODResources.Num() < 1) return FReply::Unhandled();

		// 가져올 것들
		FStaticMeshLODResources& lod = renderData->LODResources[0];
		FPositionVertexBuffer& vb = lod.VertexBuffers.PositionVertexBuffer;
		FStaticMeshVertexBuffer& meshVB =  lod.VertexBuffers.StaticMeshVertexBuffer; // UV, Normal
		FColorVertexBuffer& colorVB =  lod.VertexBuffers.ColorVertexBuffer;
		FRawStaticIndexBuffer& ib = lod.IndexBuffer; // 음수 포함

		uint32 vertexCount = vb.GetNumVertices();
		int32 triangleCount = ib.GetNumIndices() / 3; // 3개의 정점이 모여야 삼각형 하나가 되므로,

		GLog->Logf(L"%d Mesh, Vertex Count : %d", i + 1, vertexCount);
		GLog->Logf(L"%d Mesh, Triangle Count : %d", i + 1, triangleCount);

}
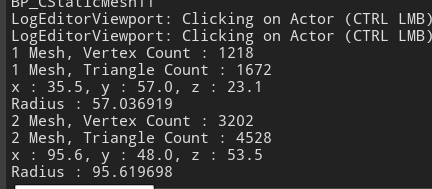
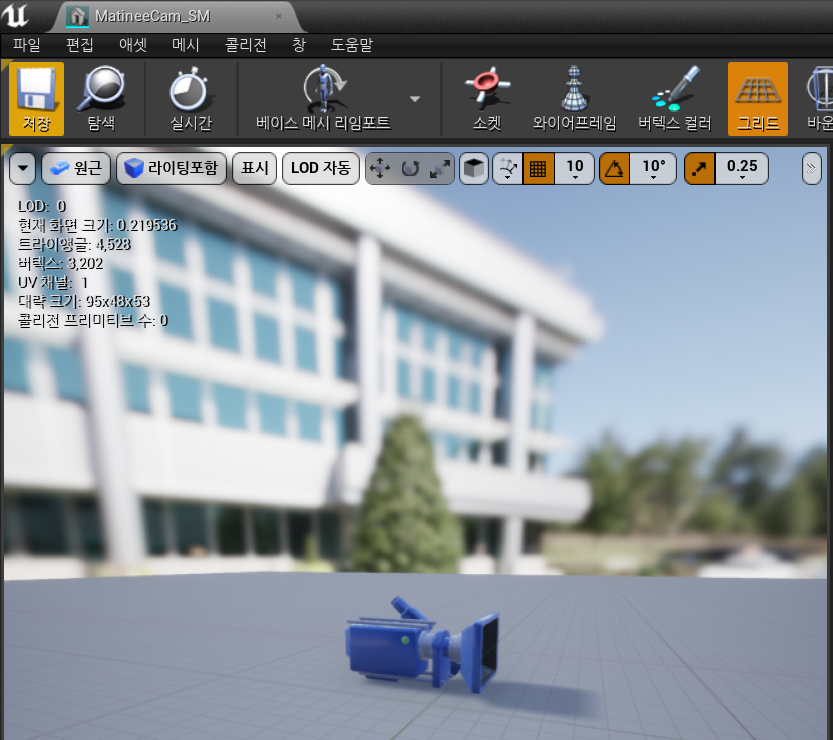
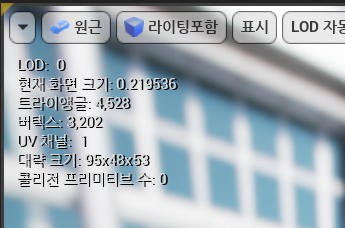
1. Static에 정보를 알아낼 수 있는 코드를 작성 후 들어가서 확인해 본다.
2. 로그에 출력되는 값과 StaticMesh에 객체에 있는 정보가 동일하게 나오는것을 볼 수 있다.
더보기
#pragma once

#include "CoreMinimal.h"
#include "IDetailCustomization.h"

struct FStaticMesh_DetailData
{
	// 저장할 데이터
	TArray<FVector> Positions;
	TArray<FVector> Normals;
	TArray<FColor> Colors;
	TArray<FVector2D> Uvs;
	TArray<int32> Indices;

	FVector Extent; // 부피
	float Radius; // 반지름이 아닌 지름으로 사용

	// 연산자 오버로딩
	friend  FArchive& operator<<(FArchive& InArchive, FStaticMesh_DetailData& InValue)
	{
		return InArchive
			<< InValue.Positions
			<< InValue.Normals
			<< InValue.Uvs
			<< InValue.Colors
			<< InValue.Indices
			<< InValue.Extent
			<< InValue.Radius;
	}
};
#include "StaticMesh_Detail.h"
#include "DetailLayoutBuilder.h"
#include "DetailCategoryBuilder.h"
#include "DetailWidgetRow.h"
#include "Misc/MessageDialog.h"
#include "Serialization/BufferArchive.h" // 버퍼를 통해 내보낼 것
#include "CStaticMesh.h"
FReply FStaticMesh_Detail::OnClicked_SaveMesh()
{
FStaticMesh_DetailData data;
TArray<FColor> colors;
colorVB.GetVertexColors(colors);
if (colors.Num() < 1) // 기본색이 0으로 되어있을 수 확률이 크므로, 임의로 정점 개수만큼 채워준다.
{
for (uint32 index = 0; index < vertexCount; index++)
colors.Add(FColor(255, 255, 255, 255)); // 흰색
}
// Box를 만들기 위해 Max, Min구하기, MAX를 -로 하면 MIN이된다.
FVector minBounds = FVector(+MAX_FLT, +MAX_FLT, +MAX_FLT);
FVector maxBounds = FVector(-MAX_FLT, -MAX_FLT, -MAX_FLT);
for (uint32 index = 0; index < vertexCount; index++)
{
FVector position = vb.VertexPosition(index);
// 최대, 최소 구하기
if (position.X < minBounds.X) minBounds.X = position.X;
if (position.Y < minBounds.Y) minBounds.Y = position.Y;
if (position.Z < minBounds.Z) minBounds.Z = position.Z;
if (position.X > maxBounds.X) maxBounds.X = position.X;
if (position.Y > maxBounds.Y) maxBounds.Y = position.Y;
if (position.Z > maxBounds.Z) maxBounds.Z = position.Z;
// 정점 저장
data.Positions.Add(position);
// Normal은 기본은 항상 Z방향이므로 수직
data.Normals.Add(meshVB.VertexTangentZ(index));
data.Uvs.Add(meshVB.GetVertexUV(index, 0));
data.Colors.Add(colors[index]);
}
// 최대, 최소 뺴면 부피
float x = FMath::Abs(minBounds.X - maxBounds.X);
float y = FMath::Abs(minBounds.Y - maxBounds.Y);
float z = FMath::Abs(minBounds.Z - maxBounds.Z);
// 반지름이 아닌 지름으로 사용, 지름 구하기
data.Extent = FVector(x, y, z);
data.Radius = FMath::Max(x, y);
data.Radius = FMath::Max(data.Radius, z);
GLog->Logf(L"x : %0.1f, y : %0.1f, z : %0.1f", x, y, z);
GLog->Logf(L"Radius : %f", data.Radius);
TArray<uint32> indices;
ib.GetCopy(indices);
//data.Indices.Insert((int32*)indices.GetData(), )
}
return FReply::Handled();
}1. 구조체로 저장할 정보들을 입력
2. 구조체 cout, cin을 사용하기 위해 operator 사용 (언리얼에서는 하나만 operator해주면 둘다 사용이 가능하다)
3. 출력하기 위한 구조체 정보들 입력해주기.
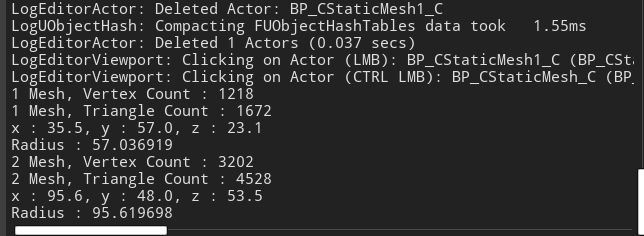
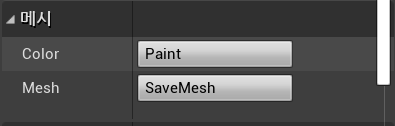
1. SaveMesh를 눌러서 확인해 본다.
2. 출력 로그에 StaticMesh와 동일한 값이 잘 나오는걸 확인 할 수 있다.
https://www.youtube.com/watch?v=ks05LeTFlNQ
'언리얼' 카테고리의 다른 글
| UE4 Button Command (0) | 2023.04.24 |
|---|---|
| UE4 Save StaticMesh (0) | 2023.04.13 |
| UE4 StaticMesh (0) | 2023.04.11 |
| UE4 StaticMesh (0) | 2023.04.06 |
| UE4 Console, Command (0) | 2023.04.05 |
'언리얼' Related Articles
more


Comments